How to Wirelessly Sync Your Windows Phone 7 with Zune
 I hate plugging my phone in. Unfortunately, that’s the only way to sync new music, podcasts and videos to it. That is, until Zune introduced wireless sync for the Windows Phone 7.
This groovy feature uses your home’s wireless network to sync songs from your Zune collection to your Windows Phone 7 automatically. With wireless sync, you can drag and drop content to your phone and have it quietly sync over WiFi the next time you plug it into AC power. No more USB cables! Here’s how to do it:
Setting Up Wireless Sync in Zune
Step One
Install Zune, connect your Windows Phone 7 or Zune HD and set it up with your computer.
Step Two
If you’re not already on your Windows Phone 7’s summary page, Click your device’s icon in the bottom-left.
Click View Sync Options. Make sure your device is connected to your computer via a USB cable.

Step Three
In the Phone tab, Click Sync Options. Select Items I choose for all the media types that you’d like to use with wireless sync.
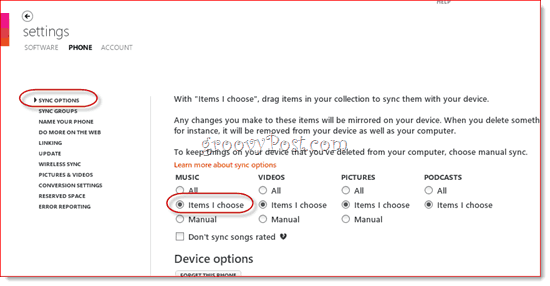
Don’t forget to Click OK to save your changes.

Step Four
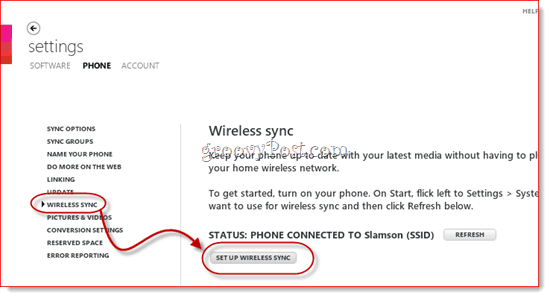
Return to Sync Options. In the Phone tab, Click Wireless sync. Make sure that both your computer and your phone are connected to the same wireless network. You can choose a wireless network on your phone by going into the Settings > System menu. When you are successfully connected, your network will be shown next to Status: in Zune.
Click Set Up Wireless Sync.
Step Five
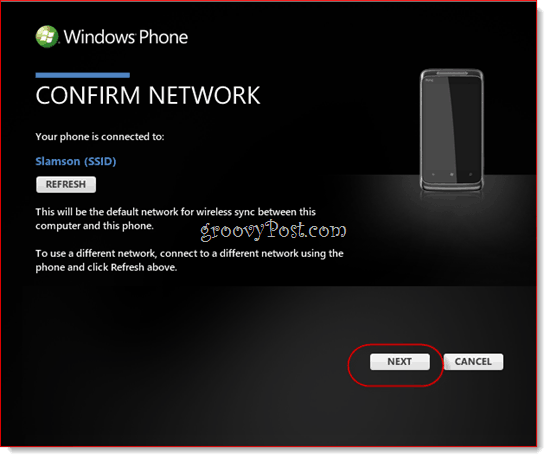
Confirm the network that you want to use for wireless sync. You shouldn’t have to change anything here, just Click Next.
Step Six
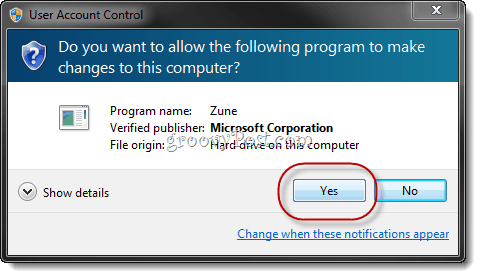
Click Yes when prompted by User Account Control.
Wireless sync will now be set up. Click Done.
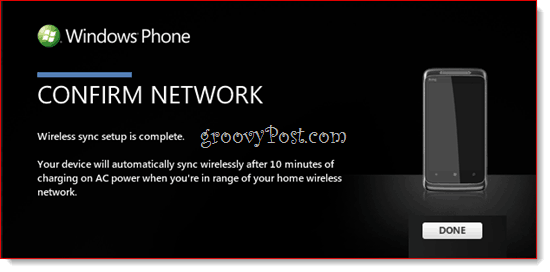
You can now disconnect your Windows Phone 7 from your computer.
Wireless Syncing Songs and Videos to Your Windows Phone 7
Step One
Connect your Windows Phone 7 to AC power. Important: This must be the wall adapter. Wireless sync won’t work if it’s plugged in via USB or into a car charger. Also, your battery have medium charge (half a battery icon).

Step Two
Launch Zune and Click Collection.

Step Three
Drag and drop songs or albums to your phone’s icon in the bottom-left.
Step Four
Leave your Windows Phone 7 or Zune connected to AC power without interacting with the phone. The backlight must be off and there can’t be any music or video playing. It may take 15 minutes for wireless sync to begin. Syncing will begin automatically, even if you have Zune closed. Your phone’s icon will animate and you’ll see the sync progress when syncing begins.

That ‘s all there is to it. If you’re having trouble, make sure that when you connect to the wireless network on your computer, you choose Home network rather than Work or Public. For security reasons, wireless sync will only work on Home WiFi networks. Also, there is currently no way to force manual sync or sync without AC power. That’s because Windows Phone 7 automatically disables the WiFi connection whenever it’s not in use and not charging in order to conserve battery usage.
Courtesy :: GroovyPost

